4.1 SharePoint Location #
File 365 works by linking files in a pre-defined folder location in SharePoint to a Salesforce record. Files uploaded to the Salesforce record are moved to this location, leaving only a reference record to the file in Salesforce, called ‘’File 365”. For files placed into this SharePoint location reference will be automatically created in Salesforce, making it available to users in the context of the corresponding Salesforce record.
4.2 Types of File 365 Object Location #
The location in SharePoint can be a SharePoint site or SharePoint folder. Creating a SharePoint site per record offers the advantages of better oversight and easier security management. Otherwise one may opt for creating folders per Record. The “Site per Record type” can be used in combination with a third configuration type : “Folder per Related Record in Site”, to store files of related child records in subfolders of parent site.
By using scripting and site templates in SharePoint you can create sites with a standard layout and predefined rights. Contact your SharePoint administrator for more information.
4.3 Create a File 365 SObject Location #
As File 365 Administrator, you control the location where files attached to Salesforce objects will be placed within SharePoint. This configuration is done by creating one or more “File 365 SObject Location” record(s). How to create an Object location will be explained hereafter. After you have created an SObject Location, make sure to deploy the Apex Trigger and Apex Testclass for this object, see paragraph 4.7.
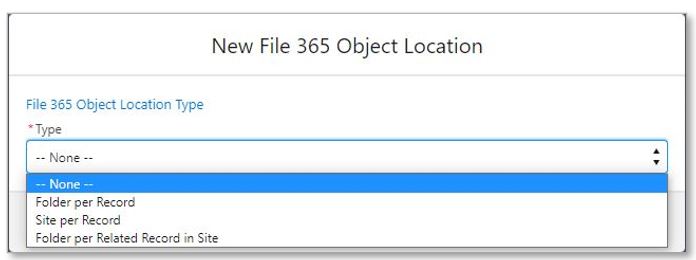
Create at least one “File 365 SObject Location”. Open the “File 365 Administrator” Salesforce App and select the tab “File 365 SObject Locations”. Click New to add a new configuration record. First select the type of SObject Location: Folder per record, Site per Record or Folder per related Record in Site.
4.4 File 365 Object Location type (1) : Folder per Record #
4.4.1 Salesforce Object Settings : Single or All #
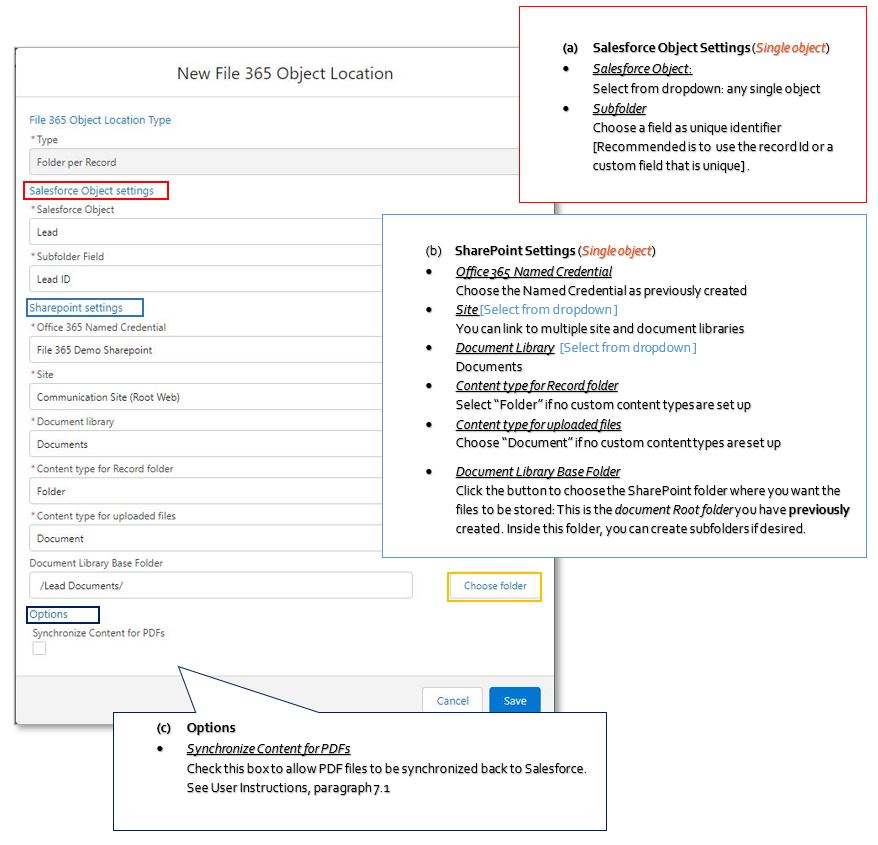
After selecting the type [in this case Folder per record], we’ll define the Salesforce Object and the SharePoint settings. You can choose to select a single Salesforce Object to define the settings for each object one by one. Or you can select “All (wildcard)” to apply the setting to more than one Object. We’ll come back to this setting in paragraph 4.4.4.
4.4.2 Single Object : Salesforce Object settings #
If you choose a Single Object type, first select the object you want to connect. You can select any standard or custom object. Next, you need to choose the “Subfolder Field”. This is the field that will be used to create and identify the subfolder for each Salesforce record. This subfolder name needs to be unique, so only Unique or Autogenerated fields are listed to choose from. We recommend to use the Id field or to create a custom field that is unique and recognizable, as this will be the name of the folder
4.4.3 Single Object : SharePoint Settings #
To specify the SharePoint location, first choose the Named Credential to use. You should select (one of) the Named Credentials you created during setup. Now the existing Sites on the SharePoint Site Collection are loaded so you can choose the root- or subsite to use. After selecting the site the existing Document Libraries are loaded, choose the one to use.
If you are using custom content types in the Document Library, you can select those in the Content Type selections. If not, just select Folder and Document respectively as the Content Types to use.
In the last field you can specify an existing SharePoint folder as the base location. File 365 will use that base folder to start building its own tree.
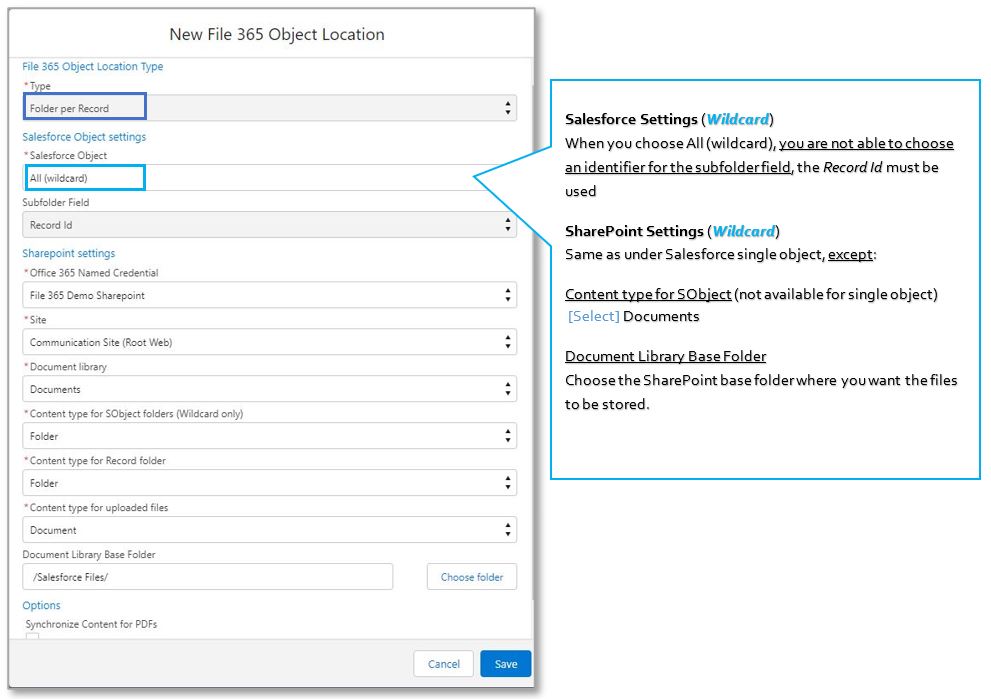
4.4.4 All (wildcard) settings #
Instead of creating an SObject Location for each Salesforce object separately, you have an option to direct all files for multiple Salesforce Objects to the same SharePoint location. For this, you need to select the option “All (wildcard)” in the Salesforce Object settings.
This is essentially a fallback option, allowing you to specify one SharePoint location for multiple Salesforce Objects.
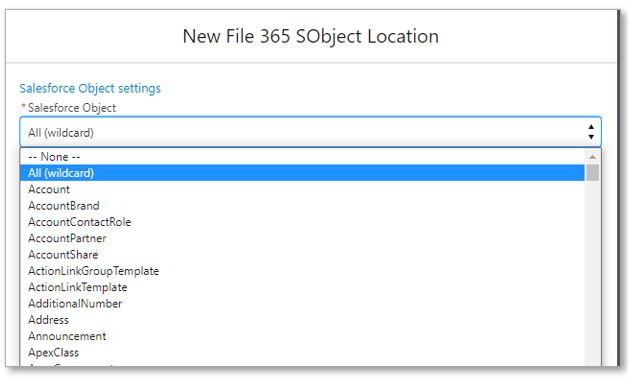
The All (wildcard) option is at the top of the dropdown list under Salesforce Object.
4.4.5 SharePoint Folder structure : single object vs wildcard setting #
On the selected SharePoint folder a subfolder will be created with the Label of the Salesforce Object. In this object subfolder, another level of subfolders will be created with the name set to unique identifier of the Salesforce Record. The difference in structure between a single Salesforce object and the “wild card” setting, is illustrated by the following examples:
Example: Single Salesforce Object
You selected the Account object as Salesforce Object and an existing unique field “Account Code” as Subfolder Field.
The selected SharePoint Settings are the site collection https://company.sharepoint.com and the default “Documents” Document Library. You created a pre-created [SharePoint] folder “Account Files” in the Document Library. If you now add a file “contract.pdf” to an Account Record with Account Code “DS-05401”, the file will be moved to the SharePoint Location:
Site: https://company.sharepoint.com
Document Library: Documents
File location: /Account Files/DS-05401/contract.pdf
Example: All (wildcard) Salesforce Object Setting
You selected the Account object as Salesforce Object. The Record Id will be used for the Subfolder field.
The selected SharePoint Settings are the site collection https://company.sharepoint.com and the default “Documents” Document Library. You pre-created a [SharePoint] folder “Salesforce Files” in the Document Library.
If you now add a file “contract.pdf” to an Account Record with Record Id “0015528a4328665AAA”, the file will be moved to the SharePoint Location:
Site: https://company.sharepoint.com
Document Library: Documents
File location: /Salesforce Files/Account/ 0015528a4328665AAA/contract.pdf
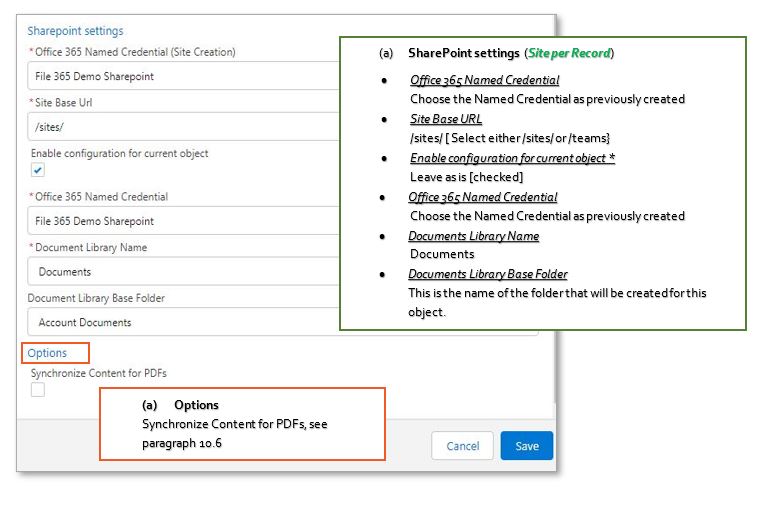
4.5 File 365 Object location type (2): Site per record #
Instead of storing all files associated to object records in one SharePoint folder, it is possible to store all files of one record in a separate SharePoint site. For this we created the Object location type Site per Record.
After Choosing the Salesforce Object, choose the Site URL field. This field must be a unique identifier for the SharePoint Site. You can use the Record Id (f.e. Account ID if you want to create a SharePoint site per Account) or create a custom field that is unique (Auto number are always unique). You can fill this field automatically with a flow or formula, as long as it’s always unique. After creating the unique field you can select this field in File 365 Object Location.
Make sure you fill this field for all records after creating the field, otherwise you will get error messages when fields are left blank and you want to upload files. If you already uploaded files make sure you change the existing folder names to the field value on the corresponding account records. Naming of the SharePoint folders works the same for al objects. So make sure you define this URL Field thoughtfully before you start configuring File 365 for the object. Especially when users need to access files through SharePoint, naming folders with recognizable names makes sense.
Next, fill out the other Salesforce Object settings and the SharePoint settings as described in the illustration below. Note that certain fields are needed for the creation of the SharePoint Site. We recommend to contact your SharePoint Administrator. Site Locale Field and Site WebTemplate are required fields; these field has to be created on the object first in order to be selected here. For more information please refer to the added appendices
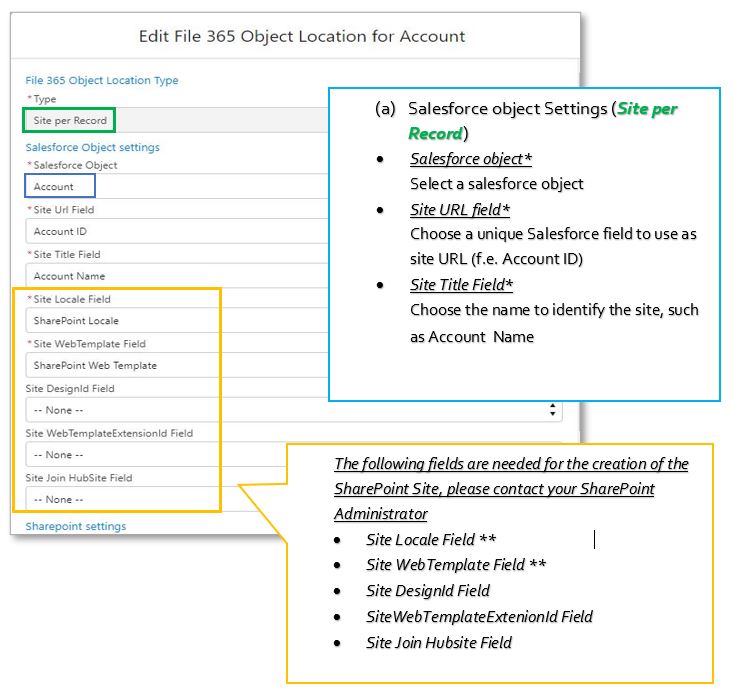
* Required field
** Site Locale Field and Site WebTemplate are required fields; these field have to be created on the object first in order to be selected here. For more information please refer to the added appendices
4.6 File 365 Object location type (3): Folder per related Record in Site #
After setting up an Object location of the type Site per Record, it is possible to store files of related child records in subfolders of the parent site. To do this we must choose the Folder per related Record in Site. In this way, we can store related Opportunity files, Contract files or Case files in the parent Account site.
After choosing the Folder per Related Record in Site type, configure the Salesforce and SharePoint settings as follows:
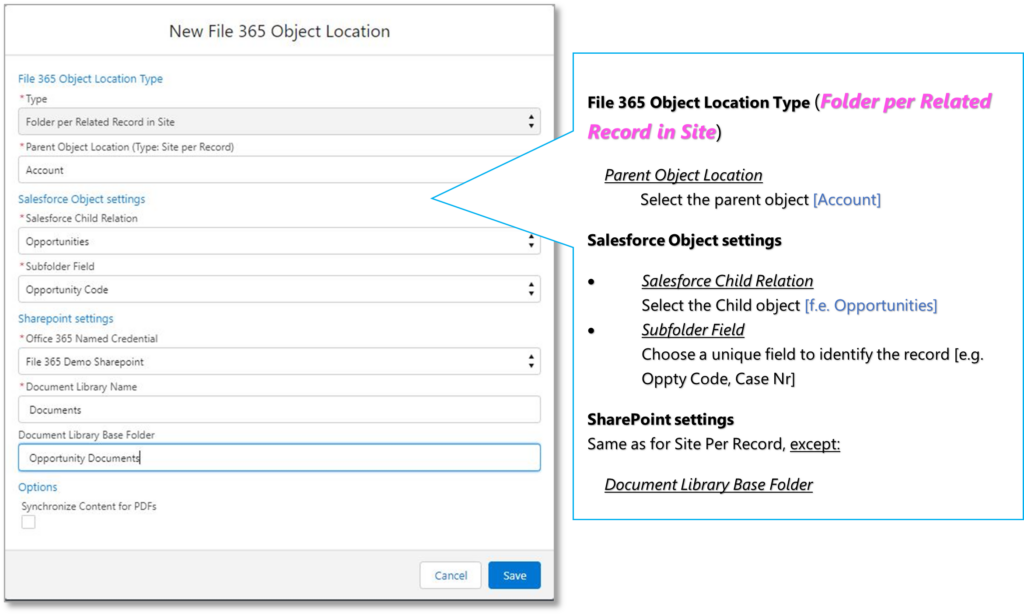
Click save to save the settings. The notation for this kind of Object Location is Parentobject.Childobject. So in the above example the created Object Location record is Account.Opportunities.
4.7 File 365 Object location: Deployment of necessary Apex Triggers #
After the creation of a File 365 Object Location, it is necessary to deploy an Apex Trigger for every object that you configured with File 365. These triggers are necessary for advanced functionalities, such as merging records and renaming files and folders. Make sure you deploy these for all Object Locations. (Note: This section only applies to File 365 version 4.7.4 and higher. If you use a lower version no further action is required and you can continue using File 365.)
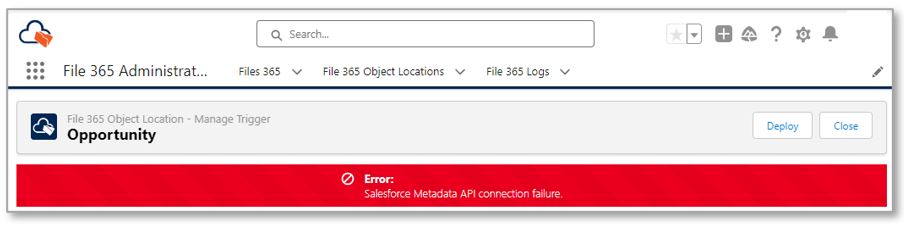
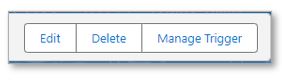
Installing the Apex Trigger can be done in a few simple steps. From the File 365 Object location you just created, click on the Manage Trigger button in the menu on the top right.
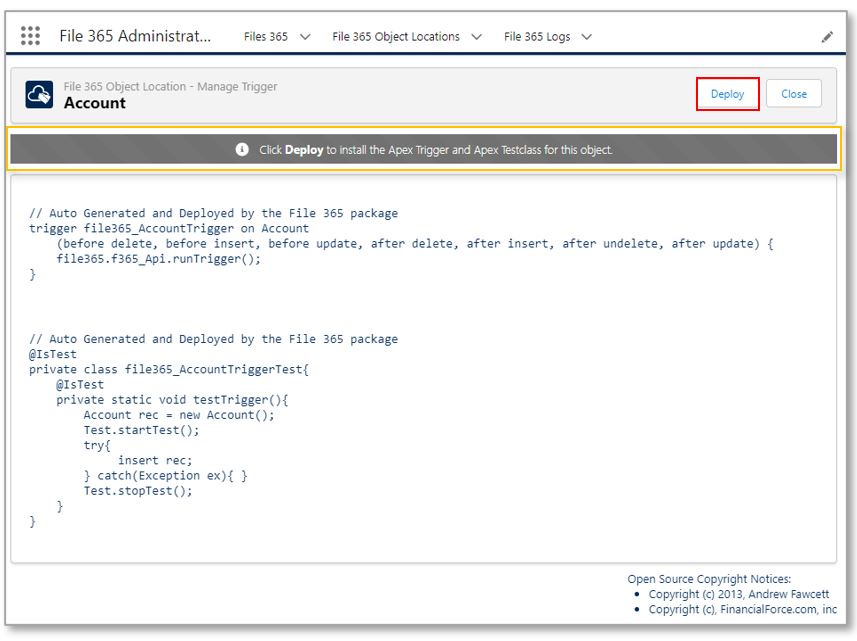
In the pop-up screen, click on the button Deploy to install the Apex Trigger and Apex Testclass for this object.
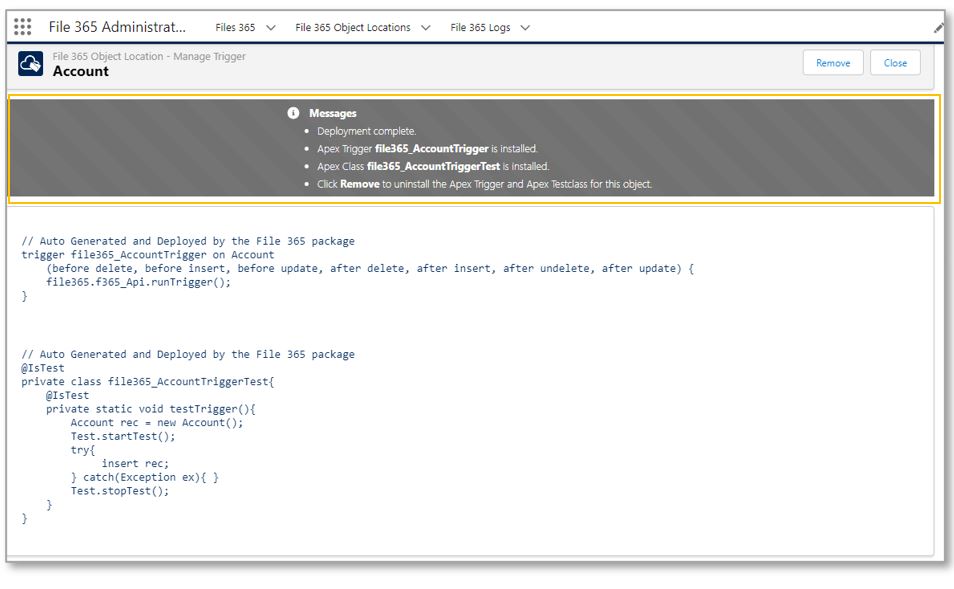
After clicking on Deploy, you will see a message that the Deployment is complete and the Apex Trigger and Apex Testclass has been installed. If necessary, the Apex Trigger and Test Class can be uninstalled with the button Remove.
Finally, deploying triggers can only be done by a user who has File 365 administrator permission. If you try to deploy as a user you will see the following error message.